
What is Streamer.bot?
Streamer.bot is one of the most powerful automation tools for live streams. The software runs locally on your production PC and connects events from Twitch, YouTube, or Kick to actions you build yourself. It can control OBS, send chat messages, play media, show and hide sources, manage variables, and trigger complex sequences.
In an IRL stream, the streamer isn't sitting at that PC. So Streamer.bot stays with OBS at the production site, while Moblin, IRL Pro, or a hardware encoder sends the mobile picture over SRT, SRTLA, or RTMP to the relay or OBS.
The web-based Streamer.bot Deck adds freely assignable buttons on your smartphone or tablet to this setup. That way you can trigger prepared actions on the road without exposing the OBS or Streamer.bot WebSocket to the internet as an open control port.
Contents of the Streamer.bot guide
- 1. Triggers, actions, and sub-actions
- 2. Requirements
- 3. Installing Streamer.bot
- 4. Connecting platforms
- 5. Setting up OBS WebSocket
- 6. Streamer.bot Deck without port forwarding
- 7. Building your first alert action
- 8. Twitch channel points, images, and clips
- 9. Useful IRL automations
- 10. Mobile feedback and other remote access
- 11. Testing and troubleshooting
- 12. Updates and backup
- 13. Security and privacy
- 14. Common questions
1. Understanding triggers, actions, and sub-actions
A trigger is what sets things off. That can be a follow, a subscription, a donation, a chat command, an OBS scene change, or a timer. An action describes the complete sequence that should react to it. The individual steps inside the action are called sub-actions.
| Building block | Meaning | Example |
|---|---|---|
| Trigger | What sets things off | Follow, sub, donation, chat command, scene change in OBS, timer |
| Action | The whole sequence that follows the trigger | "IRL: new follow" |
| Sub-action | A single step in the action | Show a source, play an audio file, wait briefly |
| Variable | A value from the trigger that later steps reuse | Display name, amount |
A follow can, for example, show an OBS source, start a local audio file, insert a name, wait a few seconds, and hide the source again. Variables from the trigger, such as the display name or the amount, can be reused in later steps.
2. Requirements for the IRL setup
- A stably set up OBS production PC.
- A connected Twitch, YouTube, or Kick account.
- A working signal path from the mobile encoder through a relay or server to OBS.
- Prepared OBS scenes and clearly named sources.
- A local test recording or a private test stream.
Only add Streamer.bot once the mobile video path works reliably. That way, if something goes wrong, it's clear whether the fault is in the uplink, the relay, OBS, or the automation.
3. Installing Streamer.bot
- Download Streamer.bot only from the official website.
- Unpack the ZIP archive into a local folder of its own. According to the official guide, you should avoid a synchronized OneDrive, Google Drive, or similar cloud folder.
- Start Streamer.bot.exe. The Windows version is portable and needs no traditional installation.
- Normally don't start Streamer.bot as administrator. Custom C# code in particular deserves the same caution as any other locally executed program.
- After the first launch, set a fixed backup location for exports and backups.
4. Connecting Twitch, YouTube, or Kick
In the platform settings, connect only the accounts whose events or chat functions you actually need. For a Twitch setup, for example, you can use separate broadcaster and bot accounts. For YouTube and Kick, the exact feature set depends on the integration currently supported.
- Open the platform you want in Streamer.bot and start the official sign-in or authorization process.
- Check the account name and channel after signing in.
- Avoid permissions you don't need and account connections you don't use.
- Use a simple chat or test trigger to check that events are coming in.
5. Setting up OBS WebSocket securely
Since OBS Studio 28, OBS WebSocket v5 is built in. It lets Streamer.bot read and control scenes, sources, and the stream status.
- In OBS, open Tools → WebSocket Server Settings.
- Enable the WebSocket server, set a strong password, and change the default port 4455 only if there's a real conflict.
- In Streamer.bot, open Stream Apps → OBS and add a new connection.
- If both programs run on the same PC, use 127.0.0.1, WebSocket v5, port 4455, and the password you set.
- Enable Auto Connect on Startup and Reconnect on Disconnect.
- Check that the current scene, sources, and stream status show up in Streamer.bot.
6. Streamer.bot Deck: IRL control without open router ports
Streamer.bot Decks are the official web-based alternative to a classic Stream Deck. Streamer.bot itself runs with OBS on the production PC. The application connects to the Streamer.bot web service, and the IRL streamer signs in on the website while on the road and operates their private deck there.
You create the deck on the Streamer.bot website. To do that, you sign in there with your own Streamer.bot account and create a new deck. Because this interface is web-based, you can then open it on the road on a smartphone, tablet, or other suitable browser device.
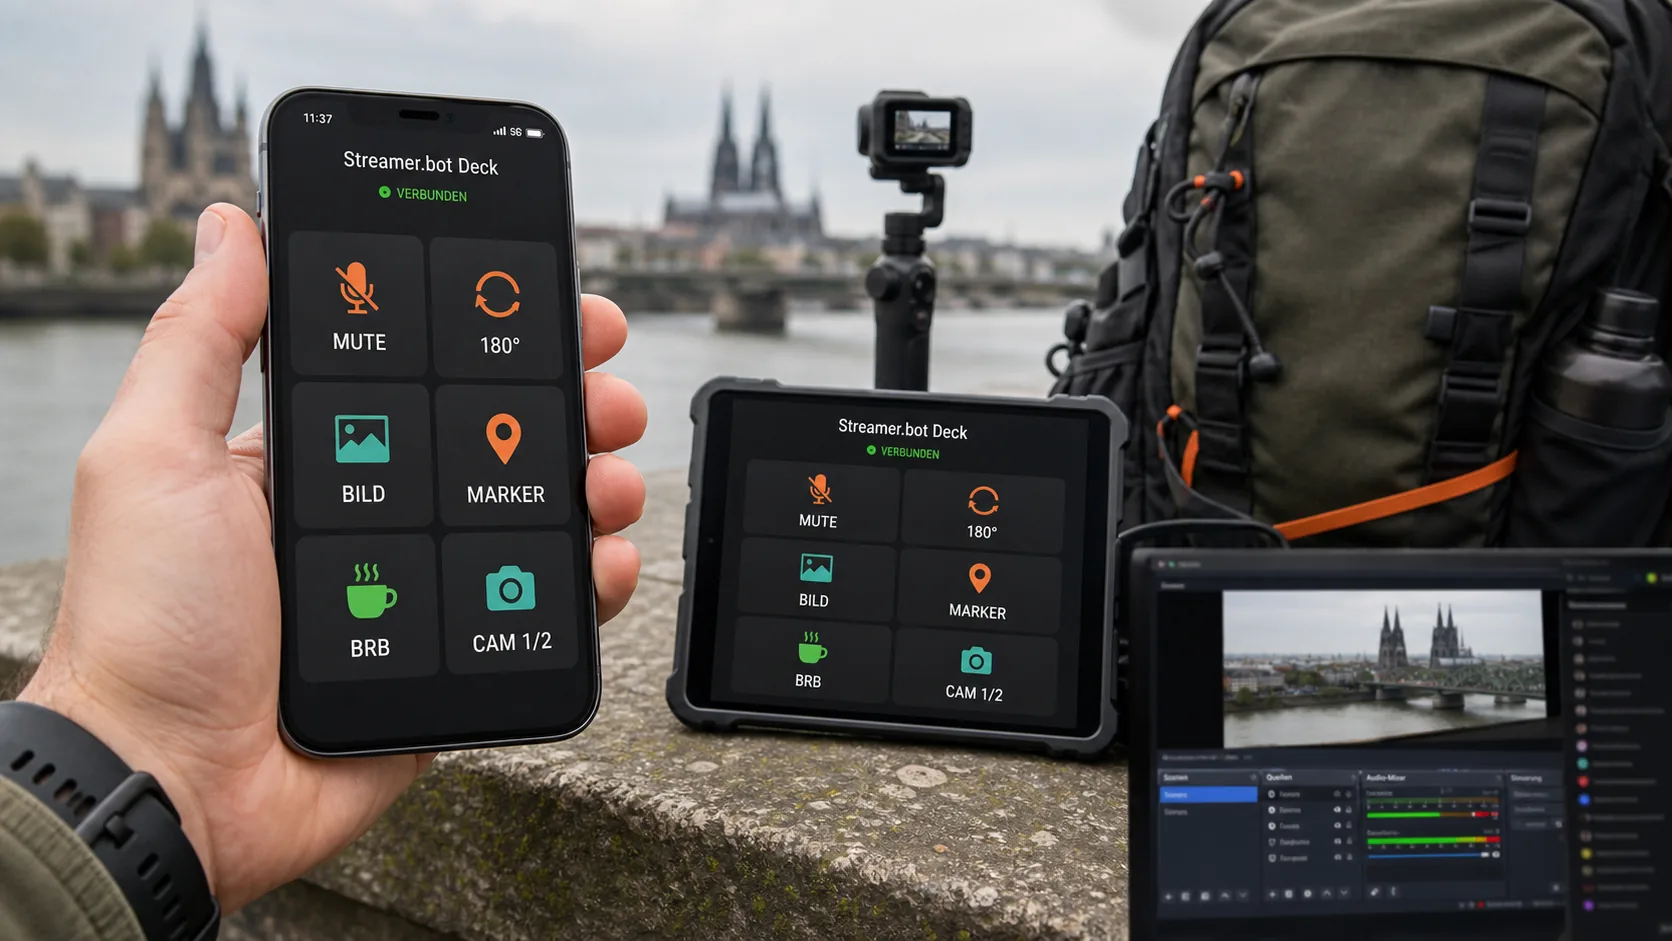
An example of a prepared IRL deck: the large buttons trigger mute, 180-degree rotation, screenshot, stream marker, BRB scene, and camera switch on the connected production system. The button labels in the illustration are in German.
The right order: actions first, then the web deck
- Finish the actions locally: On the production PC, first create every function you want as an action in Streamer.bot, for example muting the microphone, rotating a source, taking a screenshot, setting a marker, switching the camera, or switching to BRB.
- Test each action on its own: Run each action directly in Streamer.bot and check that OBS reacts exactly as intended. Only set up the web deck after that.
- Connect Streamer.bot to the website: In the local Streamer.bot application, click Login at the bottom left and finish the sign-in or authorization in your browser. That links this Streamer.bot instance to your own website account.
- Sign in on the Streamer.bot website: Open the official web-based deck interface with the same account.
- Create a new deck: On the website, create a new private deck for IRL use and, if needed, prepare several pages or function groups.
- Put actions on buttons: Assign the actions you created locally to the deck buttons you want. Keep labels short and unambiguous, for example MIC OFF, MIC ON, BRB, or CAM 2.
- Open it on the road: Open the new deck on your smartphone or tablet through the Streamer.bot website and test it over cellular, away from your home Wi-Fi.
- Keep the production system running: At the production site, OBS, Streamer.bot, and the connection to the Streamer.bot web service have to stay active. A check image should confirm that the triggered action really ran.
Useful deck buttons for IRL streams
| Area | Button | Possible action |
|---|---|---|
| Audio | MIC OFF / MIC ON | Mute or unmute the right audio source in OBS |
| Camera | CAM 1 / CAM 2 | Switch an OBS source or scene; rotate or transform a source in OBS |
| Scenes | LIVE / BRB | Switch between the live picture and a prepared break scene |
| Alerts | ALERT OFF / TEST | Mute alert audio or trigger a prepared test |
| Help | TECH | Send a canned message to production helpers or moderation |
Important for the camera: In this setup, Streamer.bot controls OBS. An OBS source can be switched, mirrored, or rotated. Switching between the front and rear camera of the mobile smartphone only works if the streaming app you use, or an additional connection, explicitly passes that function on to Streamer.bot.
For use outdoors, a few large, high-contrast buttons beat an overloaded grid. Give audio, camera, scenes, and emergency functions separate areas. Critical functions like End stream don't belong right next to switches you use often.
7. Your first alert action, step by step
- In OBS, prepare an alert scene or source group with an image, text, and a short local media file.
- In Streamer.bot, create an action with a clear name such as IRL: new follow.
- Add the matching platform trigger. For the first test, activate just a single event type.
- As OBS sub-actions, show the alert source and restart the media file from the beginning.
- Insert a short wait and then hide the source again.
- Run the trigger with Test Trigger and check the Action History if something goes wrong.
- Make a local OBS test recording and check that picture and sound play exactly once.
Only once this simple sequence works should you add names, amounts, random selection, queues, or more platforms.
8. Twitch channel points for images, Discord, and clips
Twitch channel points aren't just good for short pop-ups. A redeemed reward can start a complete action in Streamer.bot. That lets viewers, for example, request a snapshot from OBS, create a Twitch clip, set a stream marker, or briefly change a prepared scene or source.
Connecting a channel point reward
- Under Platforms → Twitch → Channel Point Rewards, load the existing rewards or create a new reward directly in Streamer.bot.
- Create an action with a clear name such as Channel points: IRL screenshot.
- As the trigger, pick Twitch → Channel Reward → Reward Redemption and assign exactly the reward you want.
- Limit the cost, the global cooldown, and the maximum number per stream and per viewer. Expensive actions shouldn't run uncontrolled at the same time.
- If you need input from the viewer, it's available to the action as a variable. Texts have to be filtered before any public display or forwarding.
Taking a screenshot from OBS
With the OBS sub-action Take Screenshot, Streamer.bot can save an image from a selected scene or source. The resulting file path is then available for further steps.
- Pick a media source: The image contains only that source's content, which makes sense for a clean camera picture without extra graphics.
- Pick the complete scene: The image contains the output composed in that scene, so for example the camera, frame, chat, alert, and other visible overlays.
- File name: Date and time plus a sanitized viewer name keep existing images from being overwritten.
- Privacy: Before saving, check whether chat, location, license plates, private notifications, or other sensitive content could be visible in the image.
Passing an image or link to Discord
Streamer.bot supports Discord webhooks for messages. The simple built-in Basic Webhook sends text, for example the viewer's name and a clip link. For the actual screenshot file, you also need a vetted file upload action, such as your own webhook/C# action or a controlled upload whose image URL is then sent to Discord.
Creating a Twitch clip or stream marker
For a reward like Create clip, the action can run the Twitch sub-action Create Clip. The documented duration is between 5 and 60 seconds. On success, Streamer.bot returns the clip URL, among other things, and you can then send it to Twitch chat or through a Discord webhook.
A stream marker is a low-key alternative if you only want to review and cut the spot later in the VOD. Stream markers require VODs to be enabled on Twitch.
Community project: Wheel of fortune for Streamer.bot
Streamer.bot can bring the wheel of fortune ("Glücksrad") by Bittersweet1987 straight into your stream as an interactive extension. The freely available GitHub project includes the local browser source needed for OBS, an extensive settings page, and a prepared Streamer.bot import. You can customize the colors, texts, images, probabilities, and win messages of the segments.
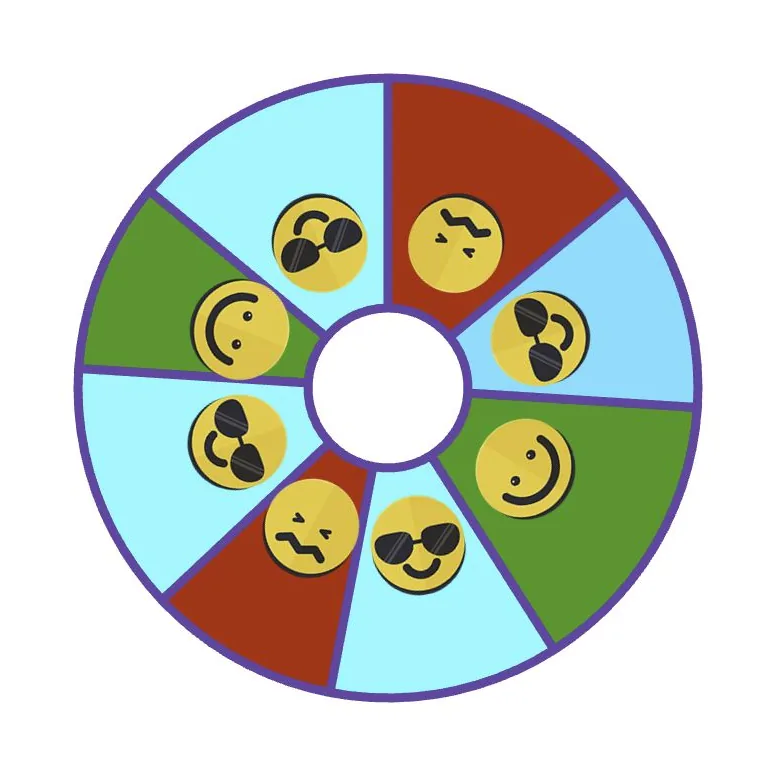
Preview from the project "Glücksrad for Streamer.bot" by Bittersweet1987. The repository describes the project as MIT-licensed.
How the wheel fits into the IRL workflow
- Download the project from GitHub and check all files before importing.
- Import the bundled StreamerBot_Import file into Streamer.bot. That creates the prepared action.
- Design the wheel through settings.html, then add the generated or adjusted index.html as a local browser source in OBS.
- Connect the imported wheel action to the trigger you want, for example a specific Twitch channel point reward.
- For donations, use the event trigger of the provider you've actually connected. Only if Streamer.bot receives the donation through that integration can it start the same wheel action automatically.
- Test the prizes and probabilities in a local recording first. Monetary values or binding prizes need clear rules. For pure fun actions, harmless effects, scenes, sounds, or short challenges work well.
The wheel of fortune is an independent community project and not part of IRL4YOU or Streamer.bot. The project description, the current source code, and the developer's notes in the repository are what counts.
9. Useful Streamer.bot automations for IRL
| Trigger | Action | Benefit in an IRL stream |
|---|---|---|
| Follow, sub, or donation | Start an alert scene and send a chat message | A personal reaction without a ready-made standard alert box |
| Chat command | Briefly show an OBS source | Show information or interactive elements |
| OBS switches to OFFLINE | Trigger a Discord notice or a local action | Production helpers notice an outage |
| Stream starts | Reset variables and enable the actions you need | A clean starting state for every outing |
| Moderation event | Lock chat, send a message, or hide sources | A fast reaction even though the streamer is on the road |
| Twitch channel points | Create an OBS screenshot, Twitch clip, or stream marker | Viewers can capture special IRL moments |
Streamer.bot can also kick off TTS, sound effects, and external integrations. Test these functions one at a time, so you don't end up with parallel audio paths or uncontrolled viewer texts.
10. Mobile feedback and other remote access
Streamer.bot runs on the production PC and doesn't automatically replace feedback to the mobile streamer. For classic browser alerts, you can keep opening your personal alert page in StreamBuddy and play it through a Bluetooth speaker or headphones.
For freely assignable buttons, the Streamer.bot Deck is the preferred route. If you also need direct access to WebSocket functions, the official documentation describes a VPN route with Tailscale, among other options. Authentication and encrypted connections have to be set up consistently.
11. Testing and troubleshooting
- Test the platform connection and the incoming trigger separately from OBS.
- Check the OBS connection status, host, port, WebSocket version, and password.
- Run the action manually with Test Trigger.
- In the Action History, check which step last succeeded and which variables were passed.
- Compare OBS source names exactly. Renamed sources can make existing actions invalid.
- Use a local recording and a private test stream before you process real viewer events.
- Also test the deck over cellular, away from your home Wi-Fi, and check each button clearly in the program view or audio mixer.
12. Updates, exports, and backup
Before an update or a bigger rework, export or back up your actions, triggers, and important settings. Review imported community actions completely before you enable them. An export is no substitute for a backup of the entire Streamer.bot folder and the local media that goes with it.
- Use only stable versions for live streams.
- Before updates, close Streamer.bot and back up the whole folder.
- Document the OBS scene collection and the Streamer.bot configuration together.
- After every update, run a private functional test.
13. Security, privacy, and moderation
- Don't publish tokens, passwords, WebSocket credentials, or exported actions.
- Connect only the platform accounts and integrations you need.
- Review community imports and custom C# code before running them.
- Moderate chat texts, TTS, and donation messages, and set length and volume limits.
- Limit WebSocket access to localhost, your own LAN, or a secured VPN.
- Regularly remove old tokens and permissions you no longer need.
Streamer.bot processes its configuration locally. Once you connect Twitch, YouTube, Kick, Discord, or other integrations, their privacy terms apply as well. More information is in the IRL4YOU privacy policy.
14. Common questions about Streamer.bot in IRL streams
Does Streamer.bot run on a smartphone?
No. Streamer.bot runs together with OBS on the production PC. On the road, you trigger prepared actions through the Streamer.bot Deck in your browser. Windows is officially supported. According to the documentation, Linux and macOS are experimental.
Do I have to open router ports for the Streamer.bot Deck?
Normally not for the deck. The application on the production PC connects to the Streamer.bot web service by itself. You should never expose the OBS WebSocket or the Streamer.bot WebSocket to the internet unprotected, though. More on securing them is in sections 5, 6, and 13.
Can the deck switch between the front and rear camera on my smartphone?
Only if your streaming app explicitly passes that function on to Streamer.bot. Without that link, Streamer.bot can switch, mirror, or rotate sources and scenes in OBS. It can't switch the camera on the smartphone.
Why does nothing happen in OBS when I use "Test Trigger"?
First check the host, port, WebSocket version, and password of the OBS connection. Does Streamer.bot show the scene and sources? Then compare the source names exactly, because a renamed source makes the action invalid. The Action History shows which step last worked. Troubleshooting along the whole chain is covered in the troubleshooting guide.
Do I need Streamer.bot, or are regular alert services enough?
For simple follow, sub, or donation alerts, classic services are often enough, see stream alerts and the alerts overview. Streamer.bot is worth it when you want your own sequences. For example, several OBS steps in a row, channel points with a screenshot or clip, or buttons for when you're out.
Official documentation and more guides
For current features, the official Streamer.bot documentation is what counts, including its notes on installation, the OBS connection, Twitch channel points, OBS screenshots, clip creation, the deck feature, and the Discord webhook integration.
Streamer.bot setup service & consulting
We help with connecting to OBS, building your own triggers and actions, alert sequences, the mobile audio path, and troubleshooting in your IRL production system.